

If you are new to smoking ribs, it can be intimidating, but it’s not as challenging as you might think. With a few tips and tricks, you can make mouthwatering ribs that will be the envy of the neighborhood. In this guide, we will discuss how to smoke ribs for beginners, including seasoning, cooking temperature, and duration.
Get Rid of the Membrane
The first step in smoking ribs is to remove the thin membrane on the backside of the ribs that won’t break down during cooking and can be chewy. You can use a paper towel to pinch a corner of the membrane and gently pull until it’s fully removed, ideally in one piece. If it tears, don’t worry, pinch it again and remove any small pieces left behind.
Season the Ribs, Bone Side FIRST!
Always season the backside of the ribs first and then let the seasoning sit for about five minutes before flipping the rack over to the presentation side. After flipping the ribs, season more aggressively and hold the seasoning from a higher point, so you get even distribution across the entire rack of ribs. Don’t stack racks of ribs on top of each other because the rub will wipe off or stick to the other racks and clump up.
Let them Chill
Because ribs are much thinner than brisket or a roast, it’s best to start the rack of ribs as cold as possible. After seasoning, put the ribs in the refrigerator for about 30 minutes or even in the freezer for 10 minutes. This way, they’ll have plenty of time to absorb smoke and develop a nice bark.
After the ribs have smoked for a few hours, a crust will develop. Lightly drag your finger over the ribs and see if the rub sticks or comes off on your finger.
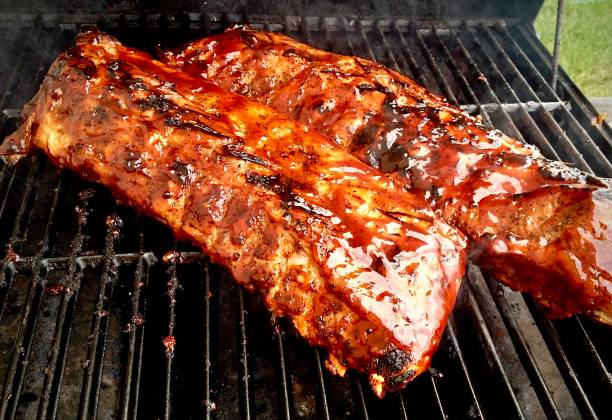
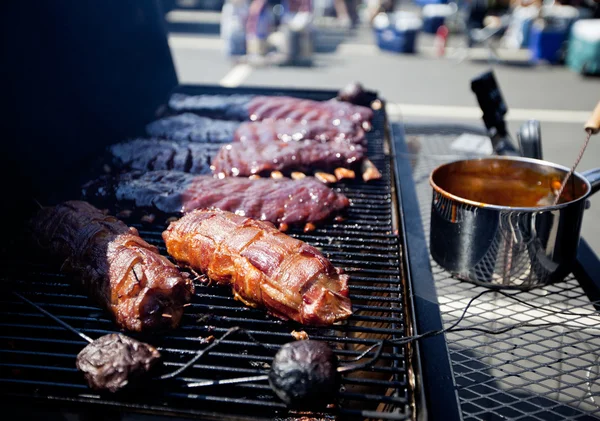
Mop the Ribs at the Right Time!
Maintaining the perfect balance between a tender and moist meat and a crispy bark on smoked ribs is crucial. One of the ways to achieve this is by mopping the ribs at the right time.
To determine if it’s time to mop, lightly drag your finger over the ribs and check if the rub sticks or comes off. If it comes off, continue smoking until it adheres to the meat. If the bark has developed, then it’s time to mop or spray.
Here’s a simple Hawaiian style spare ribs recipe that includes a recipe for a mop sauce:
INGREDIENTS:
- 1 rack of spare ribs
- 1/4 cup brown sugar
- 1/4 cup paprika
- 2 tablespoons salt
- 2 tablespoons black pepper
- 1 tablespoon garlic powder
- 1 tablespoon onion powder
- 1 tablespoon dried thyme
- 1 tablespoon dried oregano
MOP MIXTURE:
- 2 cups water
- 1/4 cup apple cider vinegar
- 1/4 cup BBQ sauce
- 1 tablespoon dry rub
INSTRUCTIONS:
- Combine all the dry rub ingredients in a bowl and mix well.
- Rub the mixture all over the ribs, making sure to coat evenly.
- Set up your smoker and heat to 225°F.
- Once the smoker is at the desired temperature, place the ribs on the smoker and let them smoke for about 3-4 hours.
- After the rub has started to set on the meat, use the finger test to determine if it’s time to mop.
- Combine all the ingredients for the mop sauce in a bowl and mix well.
- Gently mop the ribs with the mixture, making sure not to oversaturate the meat.
- Repeat the mopping process every 45 minutes until the internal temperature of the ribs reaches 195°F.
- Remove the ribs from the smoker and let them rest for about 10 minutes before slicing and serving.
When Should I Wrap My Ribs?
Knowing when to wrap pork ribs is an important decision that can greatly affect the final outcome of your dish. There are two main factors that can help you determine when it’s time to wrap your ribs.
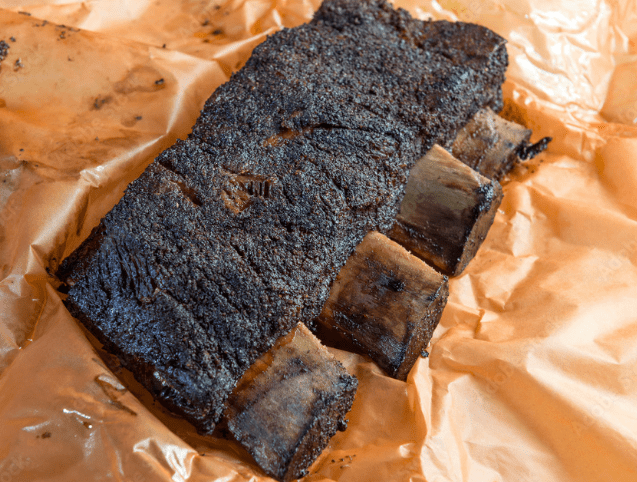
The first factor is color. Once you’re happy with the color of your ribs and how the bark looks, it may be time to wrap them to maintain that color and prevent the meat from darkening any further.
The second factor is temperature. When the ribs have reached an internal temperature of around 160-170 degrees F, they have taken on all the smoke they can. At this point, it’s a good idea to wrap them so that the meat can become more tender and choke up on the bone.
By paying attention to these two factors and making an informed decision about when to wrap your pork ribs, you can achieve a delicious and tender result that will leave your guests wanting more.
Should I Use Butcher Paper or Foil For Ribs?
There are different ways to wrap ribs when smoking them, and the choice depends on your preference and the type of ribs you are cooking.
Foil is an excellent option if you plan to sauce your ribs later and want them to have a sticky texture around the bones. However, if you prefer dry ribs, using butcher paper is better because it allows the meat to breathe and doesn’t steam it as much as foil.
The choice of wrapping method also affects the bark’s color and smoke flavor intensity. If you don’t wrap your ribs, you’ll get the best bark, but the ribs will likely have a darker color and the most intense smoke flavor.
If you choose to wrap your ribs, aim to wrap them just long enough to reach your desired tenderness level, then unwrap them to preserve as much of the bark as possible.
When wrapping the ribs, place them meat side up to avoid washing off the rub. Always double-wrap your ribs using foil or butcher paper, making sure to wrap them in a way that makes it easy to check the meat by opening the wraps.
Be Prepared
Whether you’re planning a weekend BBQ or a summer get-together, there are a few essential items you’ll need to prepare the best ribs. Of course, you’ll need the star of the show – the ribs themselves. But don’t forget about the cooking method. A smoker or grill is ideal, but in a pinch, an oven can do the job.
To achieve the perfect flavor and tenderness, you’ll need to have a few tools on hand. A mop brush and basting brush will be useful for applying the mop and sauce to the ribs. Additionally, aluminum foil and butcher paper will come in handy for wrapping the ribs during the cooking process.
A probe thermometer is a must-have to ensure your meat is cooked to the proper temperature. You’ll also need a good barbecue sauce and dry rub to flavor your ribs to perfection. Don’t forget the yellow mustard, honey, and butter, which can add an extra layer of flavor to your ribs.
With these essential tools and ingredients, you’ll be on your way to preparing mouth-watering, fall-off-the-bone ribs that are sure to impress your guests.
- Ribs
- Smoker
- Mop brush
- Basting brush
- Aluminum foil
- Butcher paper
- Probe thermometer
- Barbecue sauce
- Dry rub
- Yellow mustard
- Honey
- Butter
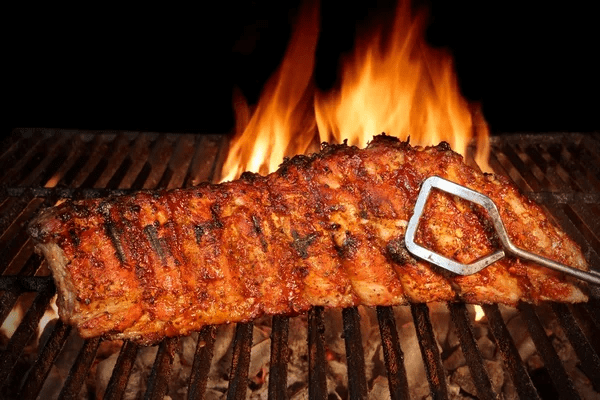
Temperature and Times
The 3-2-1 rib cooking method is a popular approach, especially for those new to Smoking Ribs. However, it’s essential to understand that this isn’t a one-size-fits-all solution. The size, thickness, and type of ribs can significantly affect your cooking time, so it’s crucial to rely on the look and feel of the meat over time and temperature.
Temperature and time can be used as a guide, but they shouldn’t be your sole focus. The tenderness and appearance of your ribs will give you a better indication of their readiness than any thermometer reading.
By mastering these skills, you’ll gain a better understanding of how to cook ribs to your preferences. So don’t be afraid to experiment and adjust your cooking technique until you get the perfect rack of ribs every time.
Abide By the Timeline
If you’re new to smoking ribs, following a timeline can help ensure that your ribs are cooked to perfection. Start by preheating your smoker to 225 degrees Fahrenheit. Trim the ribs and remove the membrane from the backside of the rack. Brush a light coat of mustard on both sides and season liberally with a dry rub. Refrigerate for 30 minutes before placing the ribs on the pit.
Once your ribs are on the smoker, don’t open the door for the first two hours. This is the time when the ribs will absorb the most smoke. After two hours, check the ribs to see if a bark has developed. If your rub has adhered to the meat, gently mop or spray your ribs for the first time. Cook for another hour before mopping for the second time and checking the temperature. If you’re happy with the color and the meat has an internal temperature of 160-170 degrees Fahrenheit, you can wrap it in foil or butcher paper.
When wrapping the ribs, lay them down on the foil or butcher paper bone side up. Place a few pats of butter on the rack, then drizzle about a tablespoon of honey and a light sprinkle of additional dry rub. Wrap the ribs up tight and return them to the smoker. Continue smoking for another hour, and if you like, you can raise the temperature as high as 275 degrees Fahrenheit to speed up the cooking process.
To test for tenderness, use a probe thermometer to poke the meat in between the bones. The probe should go into the meat with very little tension. If the meat still seems tough, wrap the ribs back up and continue cooking for another 30-60 minutes before checking again.
Once the ribs are tender, you may serve them dry or sauce them. If saucing, unwrap the foil and fold it over to create a tray to hold the juices so you can sauce the top. Brush on a thin layer of sauce and smoke for another 30 minutes. You can sauce a few times depending on how saucy you like your ribs. Allow time for the sauce to adhere to the meat before slicing the ribs.
When cutting the ribs, it’s easier to turn the rack upside down so you can see the bones better and make clean cuts. A perfect bite of ribs should leave a half-moon bite mark and expose clean meat off the bone. If the whole rib falls off or doesn’t leave a clean bite, it’s likely overcooked. It may have been wrapped too long. Still tasty and delicious, but you may want to reduce your wrap time in the future. If the bite seems tough or the meat doesn’t come off the bone clean, you probably didn’t cook the meat long enough. In the future, adjust the time accordingly.
Helpful Tips to Remember when Smoking Ribs for Beginners
If you’re a beginner to smoking ribs, don’t be discouraged if you don’t end up with the perfect result the first time around. Even experienced pitmasters have had their fair share of trial and error. Over time, you’ll learn that each smoker has its own unique personality, with hot spots and variations in temperature.
Whether you’re using an offset stick burner, a ceramic smoker, or a pellet grill, take the time to get to know your smoker. Learn the ideal temperature for smoking ribs and make notes of your experiences. Some people even keep a journal of their cooking process, including notes on the weather conditions, cooking times, temperature, and ingredients used for each cook.
Before you begin cooking, take a close look at your ribs. Are they thick and meaty or thin and small? This analysis will help you make the necessary adjustments as you cook. Remember, practice makes perfect, and the more you smoke ribs, the more you’ll become familiar with your smoker and perfect your technique.


You must be logged in to post a comment.